Saving Money with Spot ECS Clusters on AWS
By Marco Montagna on 8 August 2018
Introduction
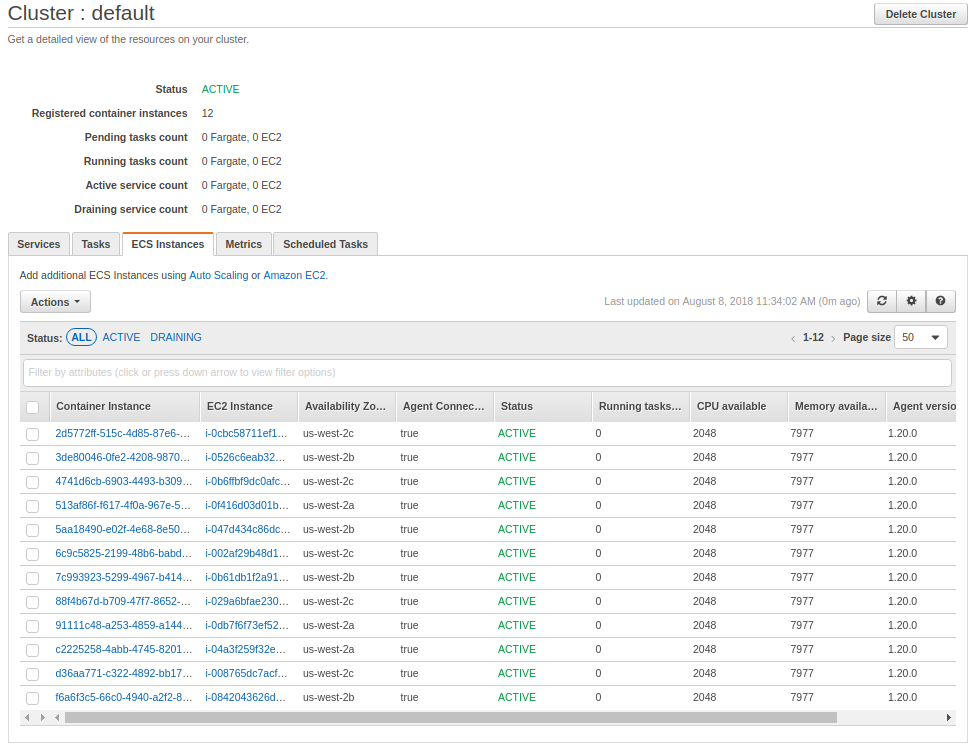
This post will show you how to save money on AWS infrastructure by running your containerized applications on a hybrid Amazon Elastic Container Service (ECS) cluster which is composed of both cheaper spot instances and more expensive on-demand instances.
Amazon Elastic Container Service (ECS) is a docker container deployment and orchestration system. It supports load balancing, auto scaling and a variety of other features which make it easy for engineers to scale containerized application across hundreds of instances.
Amazon spot instances are reduced rate instances which are run on Amazon’s spare capacity. They are typically discounted 70-90% from the standard on-demand price. In return for providing such a large discount Amazon reserves the right to reclaim those instances with 2 minutes notice.
Traditionally this has made spot instances a good choice for offline batch processing workloads which have no interactive requirements and do not suffer from the occasional service interruption.
Still, despite the risks of service interruptions the dramatic savings offered by spot instances have driven many engineers to find ways to run interactive services, like web servers, on spot instances, and indeed a well designed service can be made to maintain high uptime guarantees when deployed onto hybrid clusters of spot and on-demand instances.
Even better, a recent update by AWS to the spot pricing model has greatly stabilized spot prices and reduced the likelihood of spot service interruptions, making spot instances an even more attractive option for all workloads.
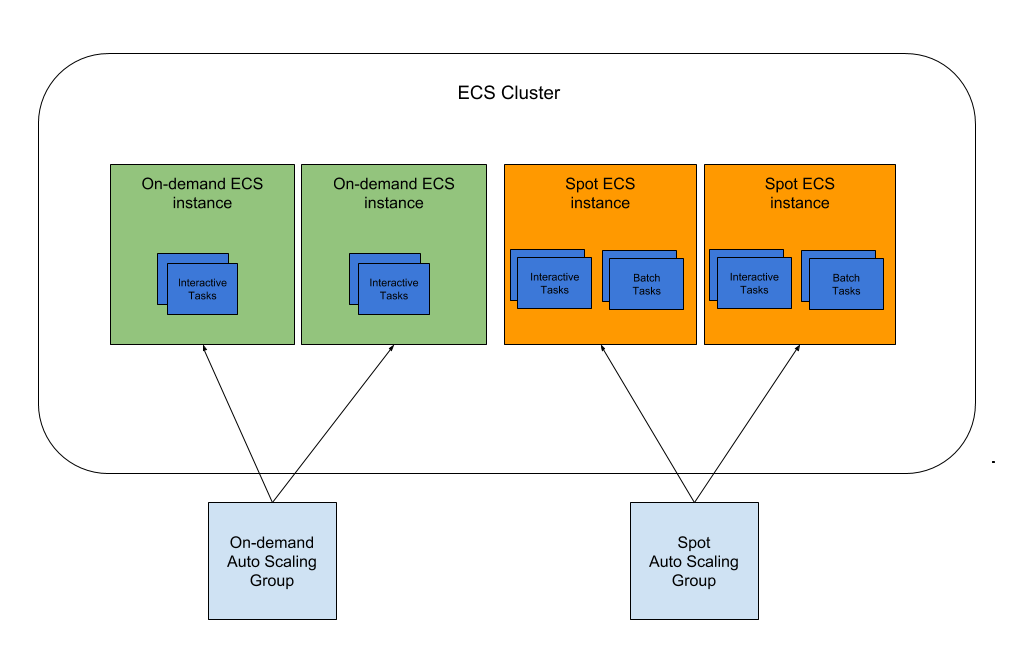
The Stack
We will create two auto scaling groups: one to manage the on-demand instances, and another to manage the spot instances.
Instances in each group will be tagged with a purchase-option ECS attribute, which will allow us to later utilize task placement strategies and constraints in order to ensure that interactive services run some or all tasks on the on-demand instances; we’ll cover this in a later blog post.
Basic Terraform Intro
We will be using Terraform, a tool that lets you describe and deploy infrastructure as code, to setup the cluster infrastructure. If you’re not familiar with Terraform you can read more about it here: https://www.terraform.io/intro/index.html.
If you want to skip the explanations and view the full Terraform script it can be found here. Below we’ll get into the nitty-gritty setup of each individual resource.
Setting Up Terraform Variables and Boilerplate
First we will set the AWS region and subnets into which we will deploy our cluster.
|
|
Here we configure the number and type of instances in the cluster.
|
|
Next we will tell Terraform how to find the most recent ECS AMI.
|
|
Creating Security Group and IAM Role Plumbing
Now we will create a separate security group for the cluster, which will allow us to restrict access to the cluster’s instances. In this case we’ll enable inbound ssh access from anywhere and outbound connections to anywhere.
|
|
Now we’ll create a separate IAM role for the cluster’s instances.
|
|
And assign that IAM role only those IAM permissions necessary for ECS to function.
|
|
We’ve left out some of the boilerplate Terraform config for attaching the IAM policy above to the IAM role; it can be found in the full Terraform file here
Creating Launch Configurations for Autoscaling Groups
Autoscaling groups use AWS Launch Configurations in order to spin up new instances so we’ll need to create some of those first. This is the launch configuration definition for the spot instances; the on-demand config is similar.
|
|
Note that we leverage the instance user data to specify which ECS cluster instances should join and we also add a custom purchase-option ECS attribute which can be used later to define task placement strategies and can be useful in guaranteeing that at least some containers for interactive services are placed on on-demand instances.
You can also configure other cluster level services here, such as logging or infrastructure monitoring software (eg. New Relic or Datadog).
Creating the Autoscaling Groups
Finally we get to create the auto scaling groups! Here we have the definition for the spot auto scaling group.
|
|
Setting Up Auto Scaling (optional)
If your cluster will experience variable workloads then it makes sense to set an auto scaling policy in order to manage utilization.
Here we have an auto scaling policy for the spot instances which aims to keep the ECS cluster at around 70% memory reservation. You may need to adjust this number depending on the types of services you are deploying, but generally we’ve found that targeting 70% reserved memory provides enough margin for deployments and auto scaling of individual ECS services for clusters with greater than ~10 instances. If you have a cluster of less than 10 instances or you schedule lots of tasks which reserve more than 50% of an instance’s available memory then you may need to maintain more free memory on your cluster, perhaps targeting 50-60% reservation in order to provide enough margin for deployments.
|
|
Deploying with Terraform
Assuming you’ve installed Terraform and have checked out and edited the template here you can deploy a cluster by running:
    terraform init
    terraform apply
Once Terraform is done your new cluster should be ready for you to deploy new tasks and services onto it!